Clear Guidence to Add Watermark to PDF on Mac Using Preview & It’s Alternatives

Summary :
Check out the detailed steps to add watermark to PDF using Preview and other professional alternatives. Explore the most efficient ways to apply text and images watermarks to PDFs on macOS devices.
Table of Contents
Add Watermark to PDF on Mac Using Preview
Adding Watermarks to PDFs means giving an extra layer of security and personalization to documents. Subtle yet visible, they can deter duplication and fraud while enabling customization.
Watermarks help retain authenticity and prevent misuse. For both security and style, implementing watermarks is a simple way to protect authorship and prevent impersonation.
This article delivers 5 effective ways to watermark a PDF on Mac, using built-in Preview and Automator, Adobe Acrobat, and a free PDF watermark creator – PDFgear.
Add Watermark to PDF with a Free PDF Editor
If you are seeking a way to add a watermark to PDF without Adobe Acrobat, PDFgear would be an excellent choice. This comprehensive PDF editor enables you to reach all the advanced features without cost.
Currently, PDFgear only allows to watermark PDFs for Windows users, but a Mac version is on the way. You can also access the PDFgear for macOS for other PDF solutions, for example, add stamps to PDFs for free on Mac, insert text and images into a PDF, and password your PDFs.
Windows users can follow the steps below to add draft watermarks to PDFs for free:
Step 1. Download PDFgear software, launch it on your computer, and open a file with this app.
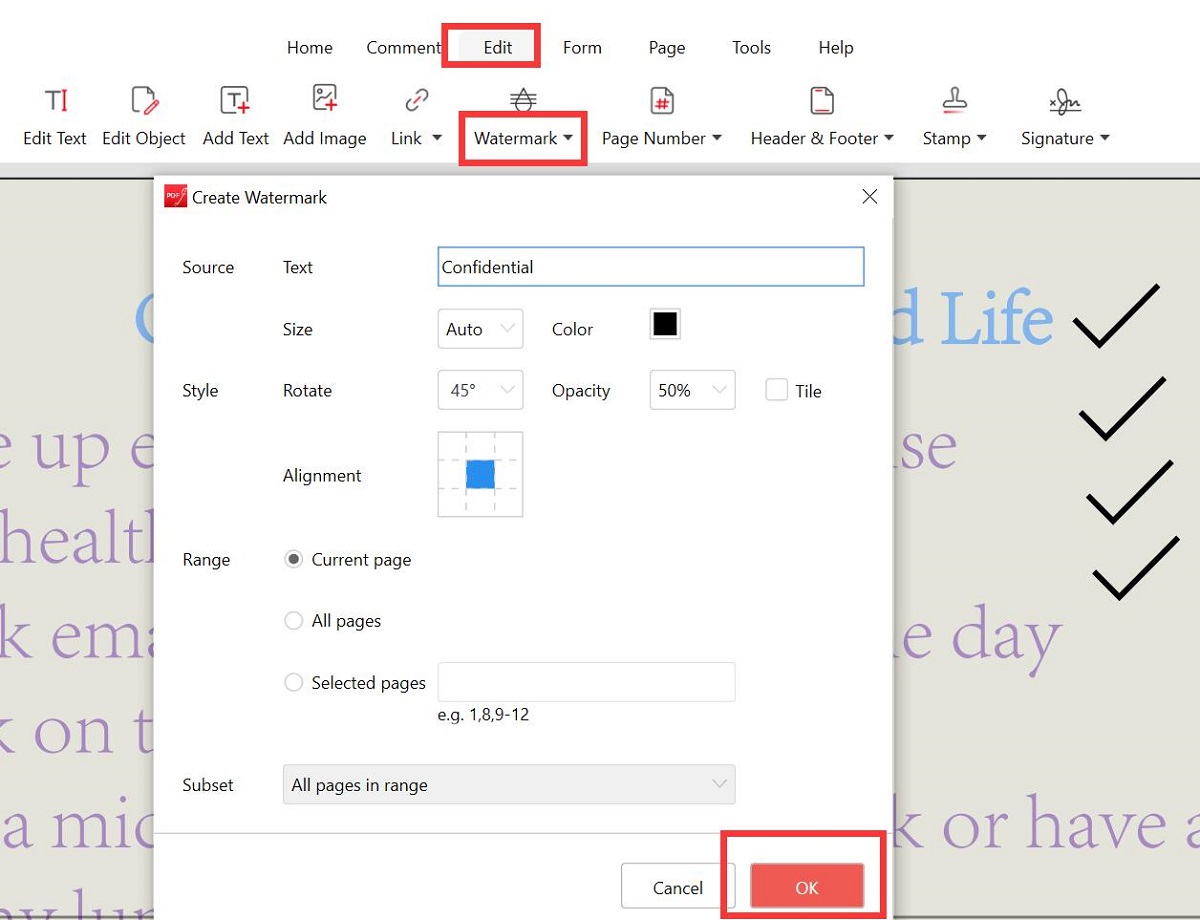
Step 2. Go to Edit, select Watermark, and choose Create Watermark.
In the new window, you can customize the related information of the watermark, and click OK to insert the text watermark to the PDF.
Add Text Watermark in PDF with PDFgear
Add Watermark to PDF in Preview
Preview is a pre-installed program on macOS devices, with which you can easily review and mark up PDFs without software download, and learn how to add an image to a PDF on Mac.
Though Preview doesn’t directly support watermarking, you can still add and edit customized text watermarks in your documents.
Simply open your file in Preview and enter text mode. Then insert a text box, type in your preferred watermark text, format it, and position the box.
By adjusting the text size, opacity, and rotation, you can overlay an elegant yet subtle text watermark suitable for your document. Check the detailed steps here:
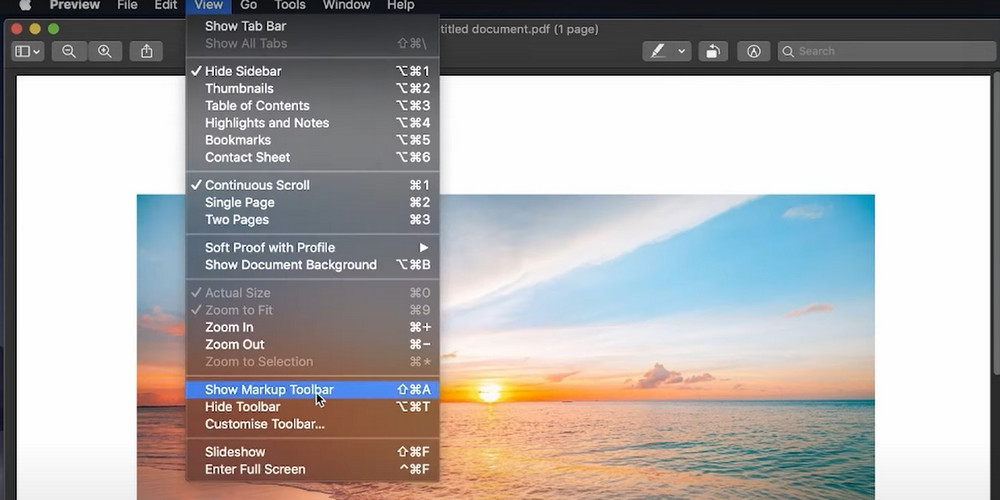
Step 1. Open your PDF in Preview, go to “View”, and lead to “Show Markup Toolbar”.
Open PDF in Preview
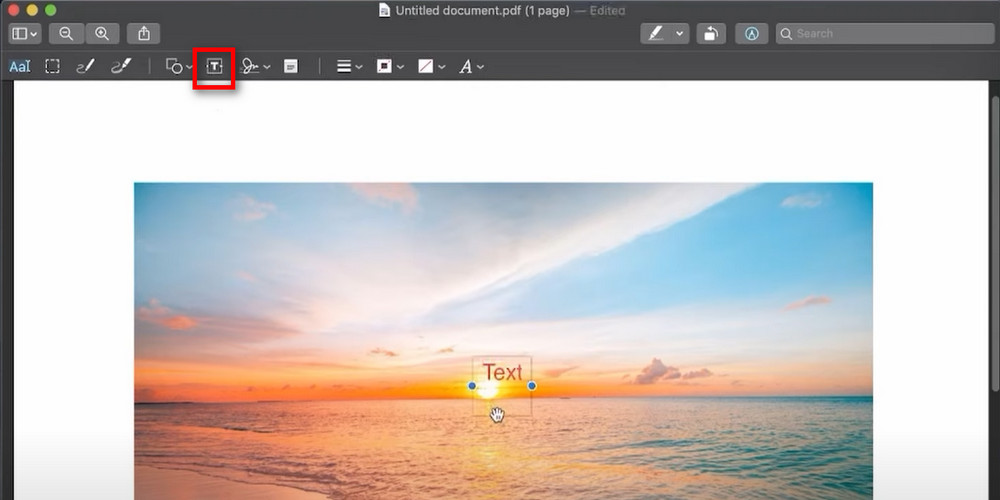
Step 2. Click on the “Text” icon and you will get a text box, type in the watermark text, and adjust the location, the font, the color, opacity, etc. All you need to do in this step is to make it look like a watermark.
Add Text Watermark to PDF in Preview
Step 3. When you are done with the watermark editing, go to “File” and export to save a copy of your PDF with the newly created watermark.
If you need more than one watermark, you can simply copy and paste the text box you build. This will save you time spent editing every watermark. Preview has the necessary tools built-in for basic PDF watermark usage. It’s worth trying for sure.
Add Image Watermarks to PDFs Using Automator
Automator is another inbuilt program on Mac that provides a handy way to batch-process PDFs and add image watermarks to a PDF. By creating a simple workflow with the Watermark PDF Documents action, you can easily apply image watermarks to multiple PDF files at once.
After setting up your preferred watermark in Automator, simply select the PDFs you want to watermark and run the workflow.
Within minutes, Automator will overlay your chosen watermark on all pages with no need to manually open and edit each file. Once the workflow is created, it’s a quick and easy way to add watermarks to PDF documents. Check the steps here:
Step 1. Open Automator, and select Quick Action from the file type window. Then choose “PDFs” from the first side column, select “Watermark PDF Documents” from the second sidebar, and drag it into the workflow window.
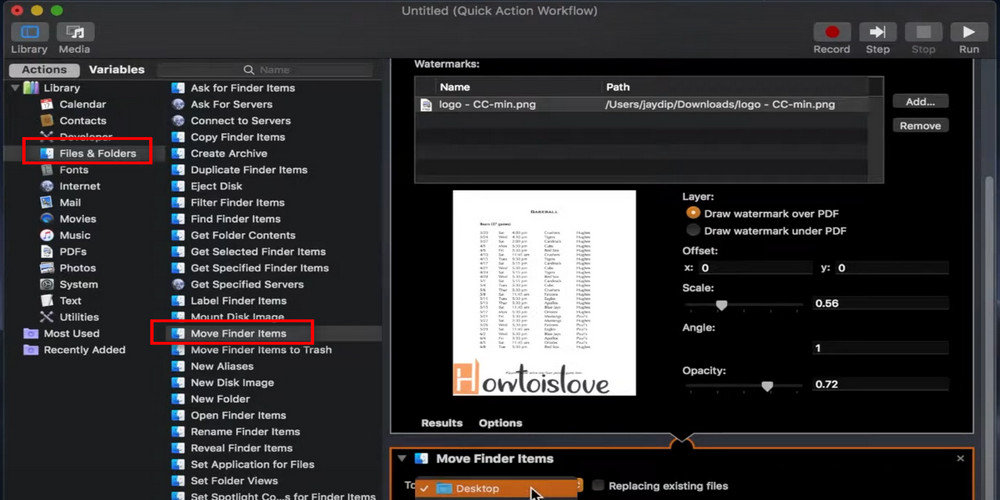
Hit “Add” and choose a pre-set image watermark, locate the watermark at an appropriate spot, and adjust the size, angle, and opacity of the watermark.

Go to Watermark PDF Documents in Automator
Step 2. Go to “Files and Folders” from the Library sidebar, select “Move Finder Items” from the second list, drag it to the right window, and choose a desired folder to store the watermarked PDFs.
Edit Watermark in Automator
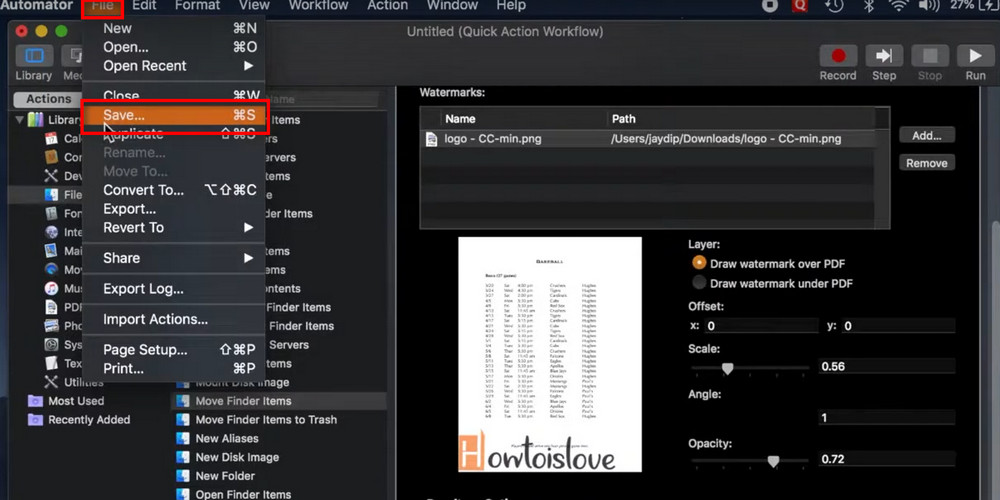
Step 3. Navigate to “File”, choose “Save” to name and save the watermark workflow.
Save the Workflow in Automator
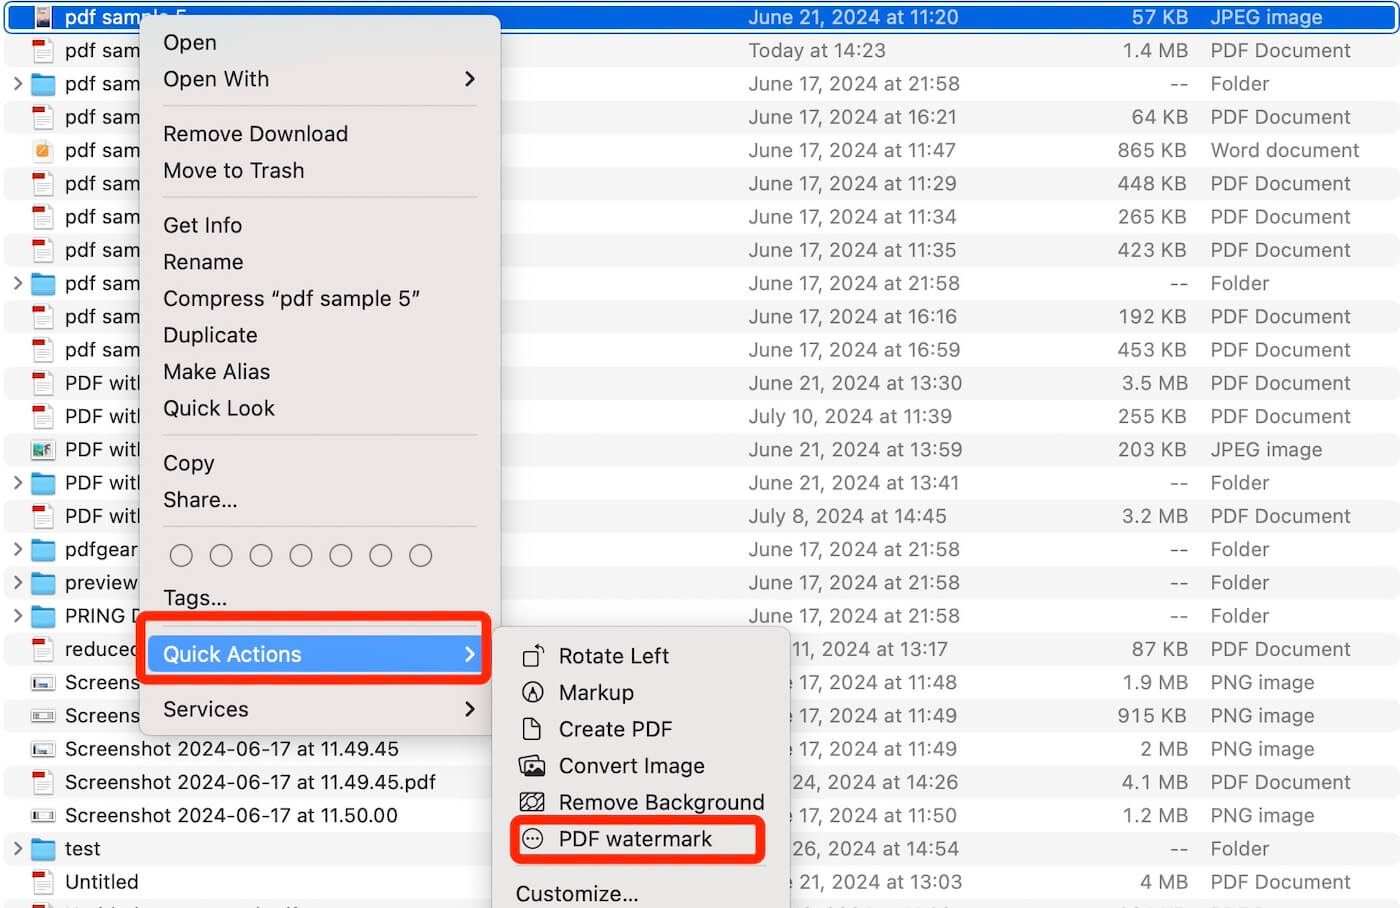
Step 4. When the PDF watermark Quick Action workflow is created, select any PDF file from your Finder, right-click on the file, select Quick Action, choose the PDF watermark workflow, and the PDF files will be automatically watermarked with the image you just set.
Apply Image Watermark to PDF on Mac
When your PDF contains many pages or you have several PDF files to watermark, Automator will be a better choice with its outstanding batch-process function. However, the process of creating the workflow may be frustrating for some users.
To improve the efficiency of watermarking PDFs, some professional PDF watermark creators might be preferred.
Insert Watermark to PDF on Mac with Adobe Acrobat
Adobe Acrobat offers a straightforward way to let you know how to watermark a PDF, allowing you to add, update, or remove watermarks in a PDF.
This professional PDF editor supports applying text watermarks to a PDF with ease. It also offers an efficient way to remove background from a PDF. However, unless you become a member of Adobe Acrobat, you can access these features.
Step 1. Open a PDF document with Adobe Acrobat.
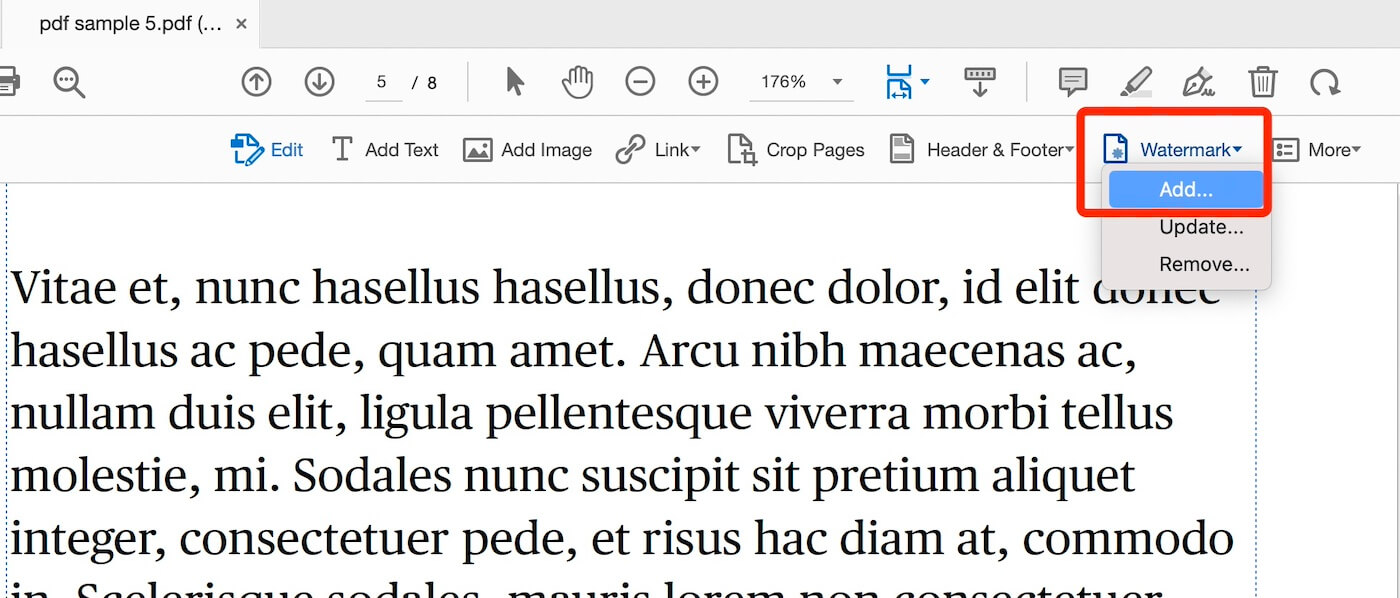
Step 2. Navigate to the Edit PDF tool, find Watermark, and select Add from the drop-down list.
Add Watermark in PDF in Acrobat
Step 3. Fill in the Text Source of the watermark, set the watermark appearance as you need, and click OK to apply the text watermark to the PDF.
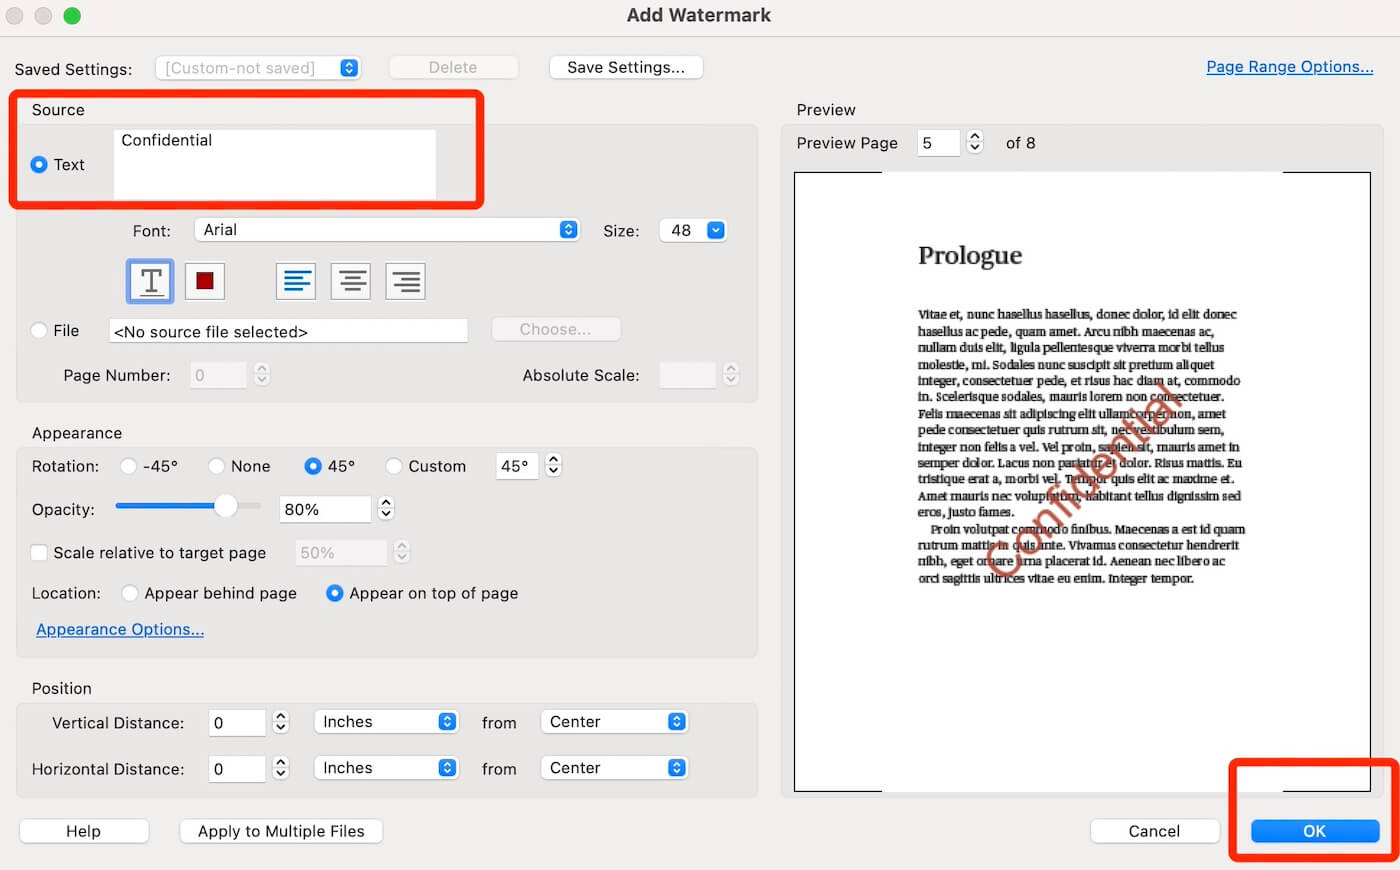
Set Watermark Appearance in Adobe Acrobat
Step 4. Head to File, save the PDF as a new document, or use the shortcut Command+S to store the watermarked PDF file.
Add Watermark to PDF on Mac by Printing
If you do not want any software to add a watermark to a PDF document, we can still provide you a solution through a simple way – printing.
You can add a text watermark in the process of printing your PDF file. It is a practical alternative to adding a watermark using Preview. Here are the steps:
Step 1. Open a PDF document with Safari, navigate to File, and hit Print from the dropping list.
Step 2. You will see the Watermark in the print setting dialogue, check “Apply Watermark”, type in your desired watermark text in the box, and set the desired position and parameters of the watermark. Then click the Print button to save the PDF file with the text watermark.
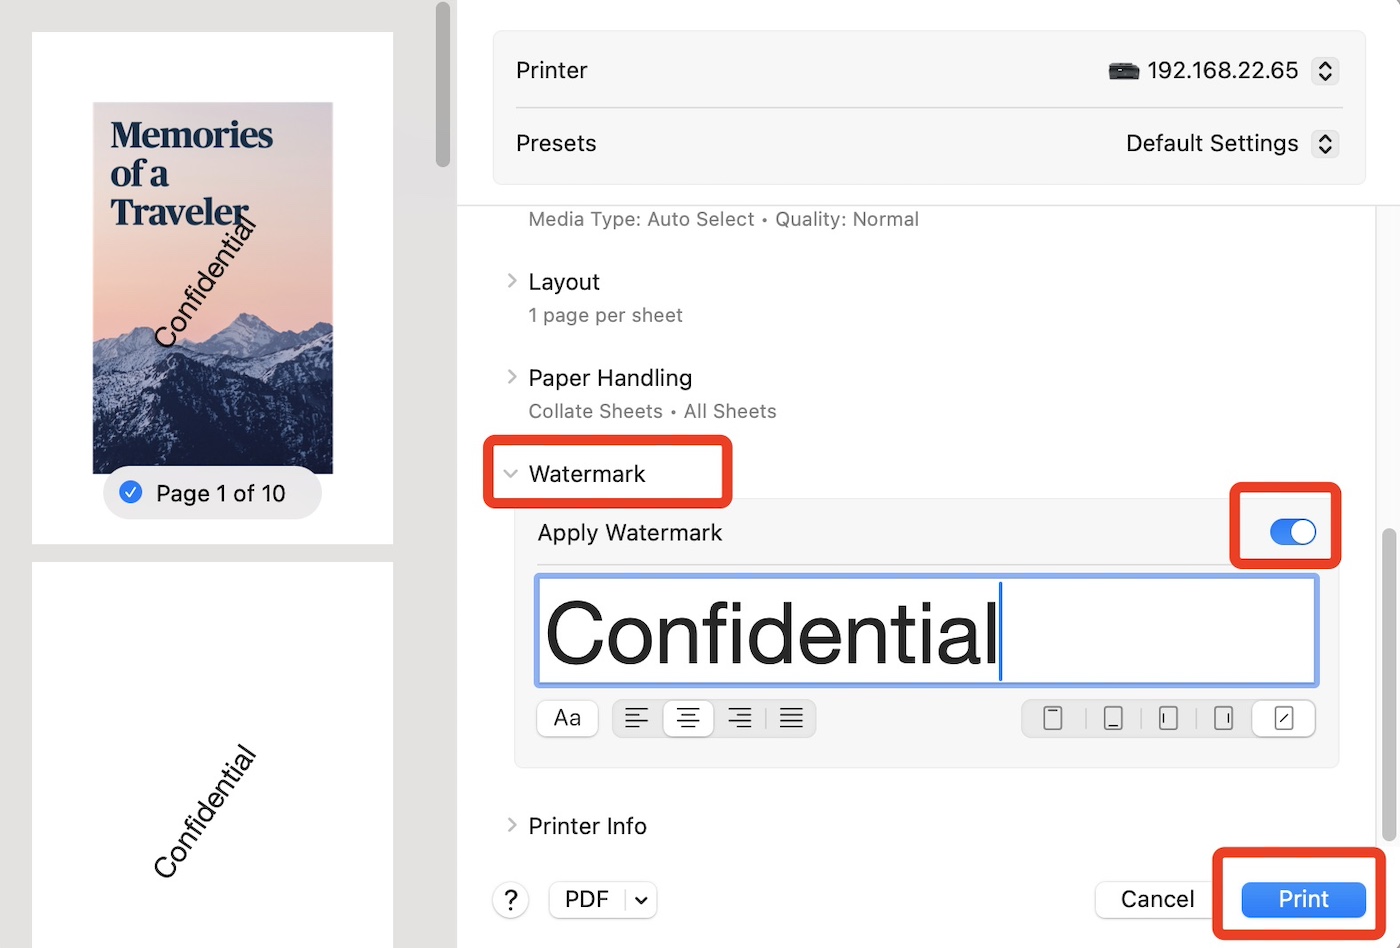
Add Watermark to PDF by Printing
FAQs
How can I add an image as a watermark in Preview?
To add an image watermark, open the PDF in Preview, go to the Markup Toolbar, and click on the ‘Add Image’ button to insert an image from your computer. You can resize and reposition the image to serve as a watermark.
Is it possible to adjust the opacity of the watermark in Preview?
Preview doesn’t offer a direct way to adjust the opacity of text or image elements used as watermarks. As a workaround, you can adjust the opacity of an image watermark using an image editing tool before adding it to the PDF.
Can I save a PDF with a watermark so it can’t be removed?
When you add a watermark in Preview and save the PDF, the watermark becomes a part of the document. However, it’s not foolproof; someone with PDF editing software could potentially remove or alter the watermark.
How do I ensure my watermark appears on every page of the PDF?
You need to manually add the watermark to each page in Preview, as it doesn’t support automatically adding watermarks to multiple pages at once. For documents with many pages, a dedicated PDF editor with watermarking capabilities might be more efficient, like PDFgear.
Can I use Preview to watermark multiple PDFs at once?
Preview doesn’t support batch processing, so you can’t watermark multiple PDFs at once. You would need to open each PDF individually and add the watermark manually, or use a PDF editor that supports batch watermarking.
Conclusion
Though Mac Preview lacks native watermarking, its versatile tools enable simple workarounds. By inserting creatively formatted text boxes or image watermarks, authenticity and ownership can still be protected.
Ranging from subtle signatures to prominent organizational logos, customizable watermarks defend documents against unauthorized use.
For individual files or batch processing, Mac’s preview and automation tools sufficiently watermark and deter fraud. When confidentiality and brand integrity are priorities, enabling protective marks through Mac’s built-in apps is essential. Implementing watermarks securely adds that vital layer of defense.